Garden hose could be every gardener’s headache. As a gardener, I also face so many problems, and most of them I tried to solve by myself. So I aware of what kind of crux you may find during using your hose and hose reel. Setting up the garden hose reel might be the easiest task to do for a gardener. Placing your hose reel just requires few techniques.
Hose reel setting up techniques relies on a few criteria. If you follow those methods properly, you have too little to think about them. Do you want to retain your garden neat and clean? Only a hose reel can make your yard look more elegant. You can buy a hose reel that is movable by wheels or you can affix it to the side or on stucco.
I will provide some effective ideas to set and install your hose reel. You have to just take the following steps carefully. No matter if you never did this before. This process will keep your hose from noosing and protect it from cracked up by sunlight or dryness. So it’s better to keep your eyes on the following article.
Setting Up the Hose Reel
To set the hose into reel, I will recommend you to put the reel on the ground or secure place first. Before you start, please make sure you bought the right hose reel. That won’t leak and also it features an aluminum water system. Because the plastic water system is not as stronger as the aluminum water system. And don’t forget to put your hose reel near a water source or faucet. Now take a look at the following.
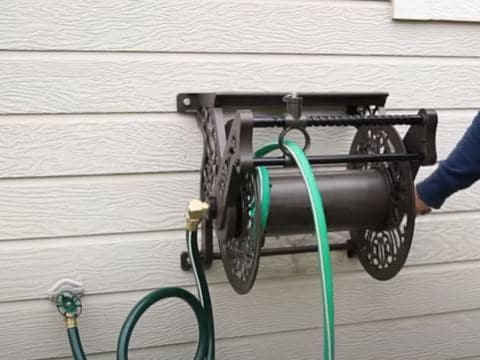
You can buy a movable style reel. Just screw on the garden hose to the hose reel. Then fix the leader hose (short lengthen hose that joins the tap and the hose reel) to the hose faucet. No handyman needed for this procedure.
At first, you will need a few additional products:
i) Starter Kit
ii) Premium-Flex Hose
iii) Hose Connector
STEP 1
Put the garden hose and reel together. There are four connection points –
- at the tap
- From the tap
- Side of the reel
- At the spray ends.
Connect starter kit at the tap from the leader hose and spray end of your hose.
STEP 2
Screw the additional tap connector to the outside of the reel and install the connector to the other end of the leader hose.
STEP 3
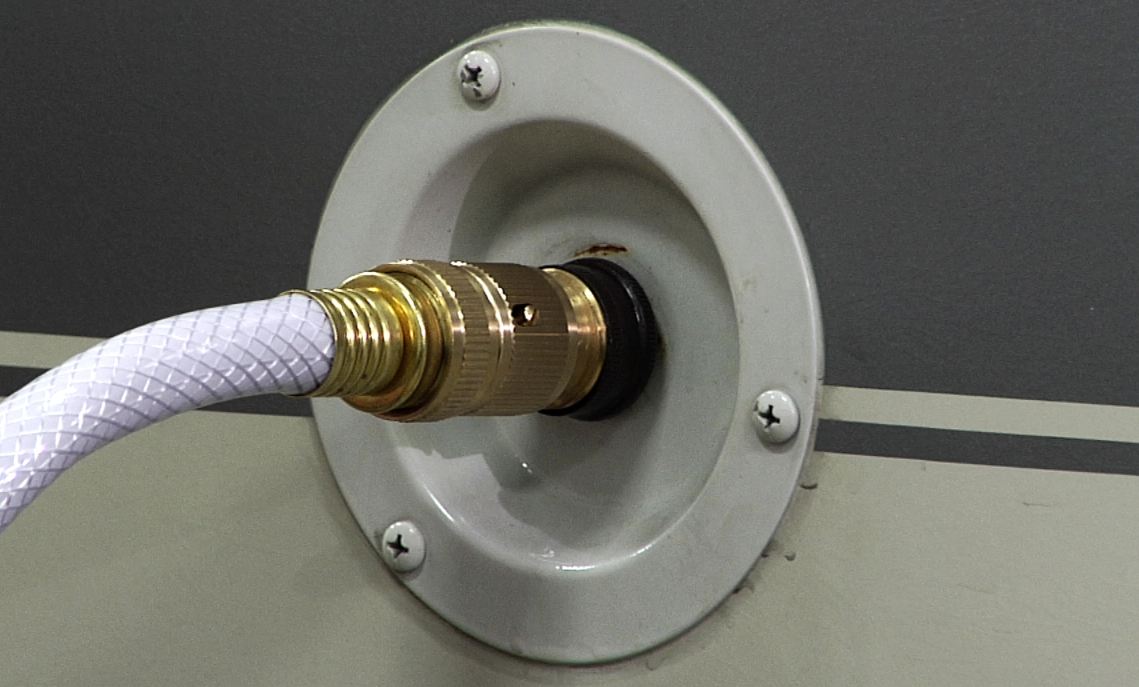
You are familiar with the female and male fitting, right? Put the rubber washer into the bottom of the hose coupling on the female fitting’s end. In order that, provide watertight fitting on the drum of hose reel. Female fitting is generally horizontal to the ground.
STEP 4
Take a screw and thread one of the end of the female fitting on the inner drum of hose reel. You need to tighten it up. Now attach the opposite end of the hose to the faucet. Make sure you tighten it up strongly but do not put so much pressure because it’s a plastic part.
STEP 5
Adjoin the female fitting and the male fitting of the water connector on the reel drum. Spin the hose onto the drum by taking effort to feed the hose back and forth across the drum in even coils. Then, rotate your hose clockwise manually so that the hose could place onto the drum.
STEP 6
If you are using an electrical hose reel, just switch the button on and everything will be done immediately.
Ensure that you have enough plots in the reel for your entire hose. I will give a detail about installing hose reel on next.
How to Install Hose Reel
You can install a new hose reel. You will need a drill, screwdriver set, and pliers.
Step 1: Select the Mount Location
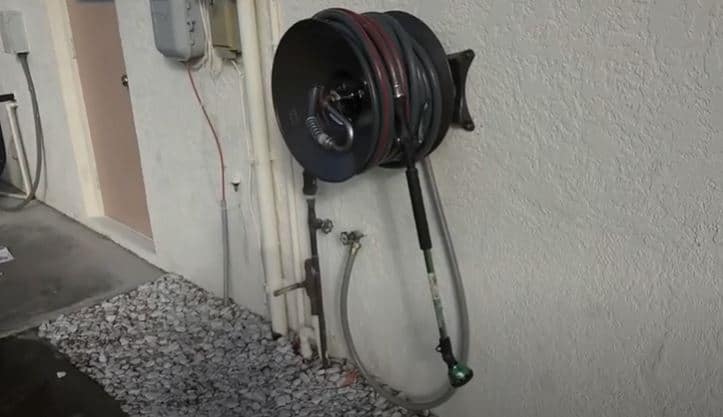
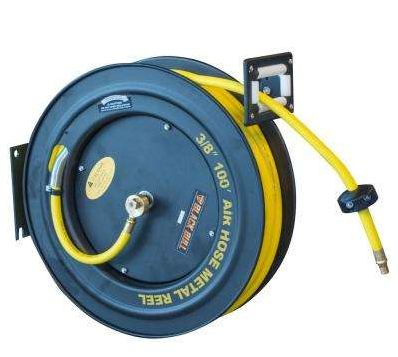
It can be mounted on a structurally sound floor, wall, or ceiling. You have to buy a perfect reel by considering the spot and your need. You can buy plastic reel but metal one is more comfortable and reliable.
Step 2: Install Mounting Bracket
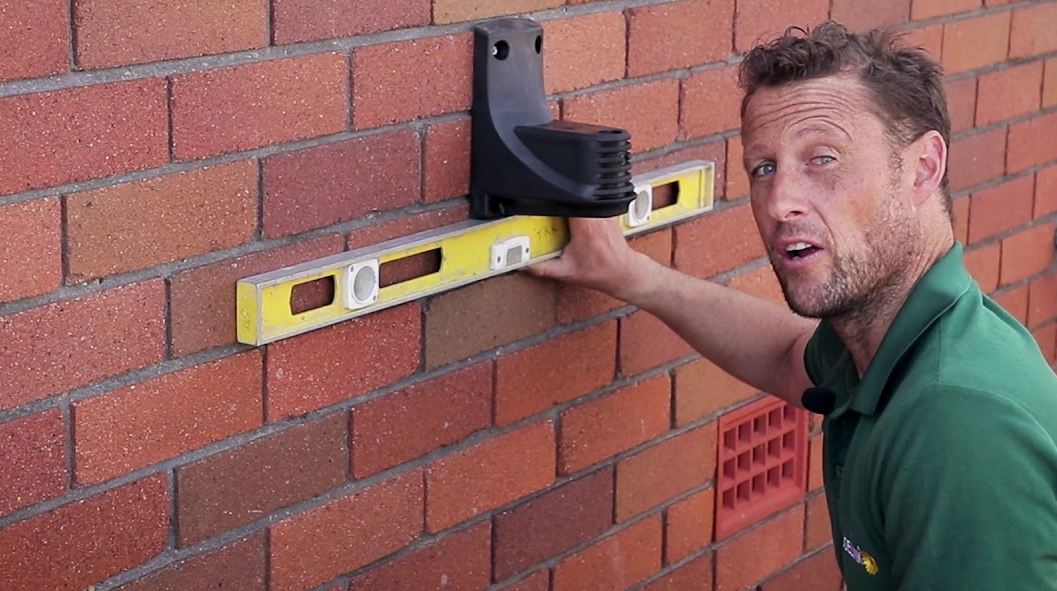
Pick the spot to install it. As often the hose reel comes with short length, you have to locate it closer to the faucet. Another important thing is the height. Don’t put it so lower place that can’t be recognized or don’t put it higher that can be difficult to use.
Step 3: Mount Hose Reel
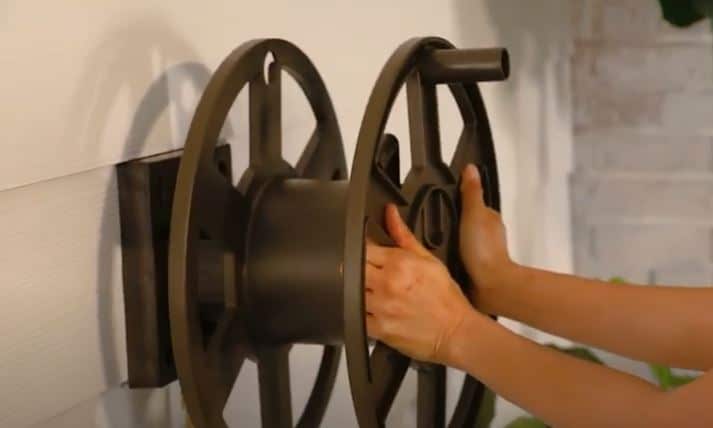
mount the hose reel to the bracket. Double-check the height. Generally, a mounting bracket is added for wall which allows the reel to be fixed centrally.
Step 4: “Down” Terminal Connection Block
Determine the center of the mounting hole. The next job is to align the carriage block with the center line of the hose. You can use a square to find the reel’s centerline.
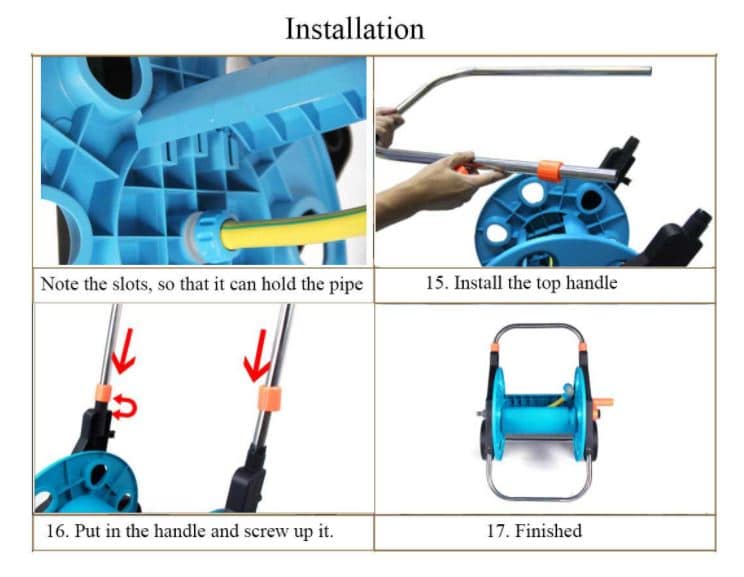
Step 5: Install Hose Into Restrain
Press and twist the hose to restraining.
Step 6: Install Hose Fittings
Stabilized the reel and turn the drum clockwise by till tighten up. Confirm that the drum has a latched position.
Step 7: Install Hose On a Reel
You can use the direction of the wind to install the hose. Hold the hose during tightening up.
Step 8: Wind Hose on Reel
Ordain counter-clockwise while working on left side and follow wind clockwise during working on the right side.
Step 9: Pre-wind Hose Reel
It has been used to get a safe, convenient, and workable way to deploy a garden hose. Mounted the hose reel on mast in this step.
Step 10: Mount Hose Connection Terminal
Install clamp locating tab between first and second segments
Step 11: Connect Truck Hose
Install the fittings and connect truck hoses.
Step 12: Recheck and Clearances
Check the leak and rust. If any leak has found, fix it with rubber grommets. In case of rusted, do clean and paint it smoothly.
How to Install Hose Reel on Stucco
If someone walks on or step on your hose, you may not like it. Though it seems easy to hear you have to be more concerned about the design. So, to get the perfect stucco fitting for your hose reel, you have to be more careful because it could be cracked or crumbled.
Some minor tools will be needed for this task.
- Drill
- Masonry drill bit
- Screwdriver
- Anchor set (with screws and anchors)
- Decent power drill (electric or cordless)
- Caulking (acrylic, silicone or polyurethane)
- Hammer
- Pencil and pen
Step 1
Mount a wooden plate to protect the wall by using masonry screws, or 3 inches galvanized screws near the spigot. The height for mounting should be 3 to 5 feet off of the ground.
Step 2
Draw a one-inch line by pencil along the top or side of the previous point. Sync the distance or length of spigot and the side. Accuracy is foremost here.
Step 3
Hold the hose reel and trace a line at the top and bottom of the reel.
Step 4
Line up the hose reel straightway with the reference line. Mark a dot at the center of mounting. Now mark the remaining holes.
Step 5
In this step, we are going to do the most interesting thing. Guess what? Yeah, drilling depends on the stucco system of your building.
It could be penetrating about 1 inch to 1 .5 inches by using a masonry or concrete drill bit. Make a dot in a drill bit at your desired depth to get an accurate result. If you use a fastener, double-check that fastener size is equal to the depth. Now dig through the wall by considering the narrated step.
Step 6
After drilling the wall, seal the holes with silicon or polyurethane or acrylic caulking. Otherwise, it will get filled with dust or damaged by moisture.
Step 7
Hold the hose reel against the wall and aligned it with the holes. Place the screw and tighten it by using a screwdriver.
In case of installing anchor in the stucco wall, gently flip you, anchor, into the wall until it settled close to the wall. You can buy a plastic anchor or metal one and follow the process.
To make better use of your hose reel. Keep some facts in your mind.
- Place your reel in a safe way.
- Buy the perfect lengthen hose and hose reel.
- Whichever process you may follow, make sure the hose and reel are safe.
- Storage properly when you don’t use it.
Final Words
I have gone through several ideas and got a flexible one. Hope the process will also help you to do your job properly and efficiently. Your hose reel remains unused during winter. So, to protect it, add some silicon grease to each rubber gasket if needed.
If you can’t take it inside your house in winter, disconnect the spigot and remove nozzles. Wait till dry up properly. Now, your hose reel and hose is ready to store. Everyone wants to use the reel properly. There are different types of hose and hose reel. So, before following any method, be careful to select the right one.